I recently installed a Loksound Micro sound decoder in my Kato N-scale F40PH. What follows are quick and dirty instructions for installing the decoder.
Disassembly can be a bit tricky if you haven't taken an F40Ph apart before. On the conductors side rear of the engine and engineers side front of the engine, there are locking tabs which hold the shell and the frame together. The shell assembly, including the glass, needs to be carefully lifted above these tabs. I carefully slide a chisel blade in an xacto knife under the tabs to loosen them.Others use a toothpicks for the same purpose.
Once the shell is removed, remove the light board from the chassis by removing the small clip that holds down the motor tabs. Push the motor tabs straight up and out of the way.
At this point, I made 3 modifications to the light board.
The main thing you need to do to prepare the decoder for installation is to exchange the rectangular speaker that comes with the decoder for a pair of round 1/2 inch diameter speakers.
The chassis modifications I made were very simple modifications to provide support to the rear speaker, which is going to be installed in the location of the original rear headlight.
My first step was to remove the rear plastic retainer from the chassis and carve off the two ridges that were on each side of it's top with a chisel in an xacto knife and/or a small file
Once the surface is flat, Install a small length of .100" square styrene to the top. This will create a small echo chamber for the rear speaker
Now, you're ready for the installation of the decoder on the chassis.
Before installing the light board back on the chassis, insulate the metal contact strips that take power from the trucks to the light board with a small piece of kapton tape in the area where the motor tabs may contact them.
You can now reinstall the light board on the frame, and test the installation
For reference, here's an image of what my locomotive looked like at this point:

And here is the same image, with a summary of the changes made to install the decoder on the chassis:

Once you are satisfied with the installation, you can slide the components back onto the chassis. The results should look something like this:

The photo also shows that the entire decoder/speaker assembly fits in the space behind the cab insert, so you can leave that in place in the shell if you like.
If all you're going to do is add the sound decoder and make the front headlight work, all you need to do to make room for the sound decoder and speakers is remove the light pipe to the rear headlight and the Grey view block that supports it.
Once I was satisfied with the fit of the decoder in the chassis, I glued the rear speaker to the two .100" styrene blocks that were installed to hold it.
In order to let the sound out of the shell, you need to create an opening for the sound to escape. On my model, I used the BLMA fans specified in the parts list as speaker grills. Follow the BLMA instructions for installation. The Q fans are installed in the radiator section.
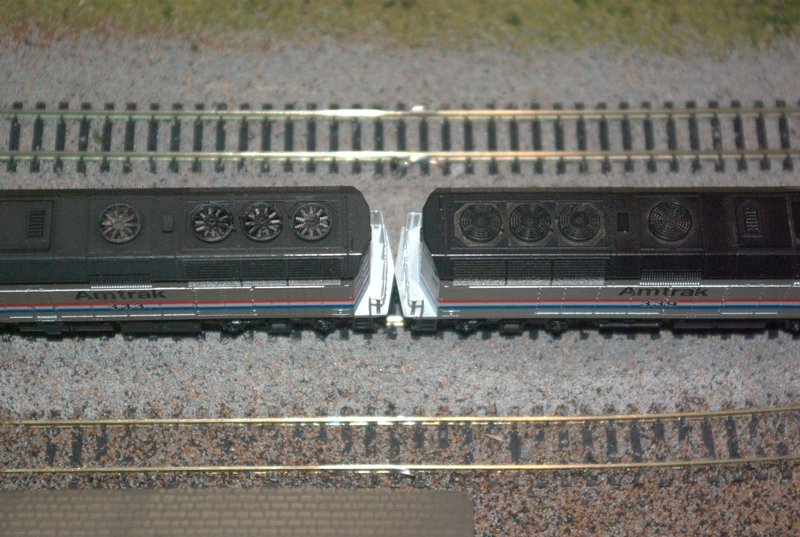
Here's a photo comparing the BLMA fans to the original Kato Fans.
I decided to install a few other lights to the front end of the locomotive, so I made a few other minor modifications to the chassis and shell
First, I cut the glass insert for the cab so that the cab insert could be slid straight down, instead of needing to be removed by sliding it backwards.
Second, I cut the light tube for the front headlight so that I could pull the chassis out with with the tube attached, but still leave the headlight lenses in place. I glued the small headlight piece to the inside of the shell.
Finally, I glued the cab insert, with the light tube attached, to the chassis. These modifications allowed me to install surface mounted LEDs for the roof mounted strobe lights an the red light between the two number boards above the cab.
I plan on installing a surface mounted LED for the rear headlight, but I have yet to make this installation.